Workflow Engine
- The workflow engine allows user to define workflows existing in the system. The list tab displays all the workflows. The Template tab displays all the pre-configured templates available in the SmartShopFloor portal

Lock & Load
The lock and load workflow allows user to set a dependency of one or more operations over other operations. Please find the steps to setup this workflow.
Use Case
- This workflow provides visibility to operators that their previous operation is complete, and they can start working on the next one.
- On a shop floor, a single job with multiple operations performed sequentially will have dependencies.
- For example, to manufacture something, the pre-requisite says all the raw material has to be gathered first.
- Suppose an operation is defined as 'Raw Material' and then the main operation 'Manufacture'.
- The operator will be able to gain visibility on the Daily Work/Work In Progress/Production board using this workflow setup that 'Raw material' is complete and 'Manufacture' can be started.
- When the operator completes 'Raw material', the card for 'Manufacture' will be converted to a green background in the boards and they will be sequenced at the topmost positions, right after any operation whose work is in progress.
Setup
- Click the Workflow engine menu item.
- Select the Lock & Load from the left side panel.
- Click the Add workflow button. Input the flow name as relevant to your use case.
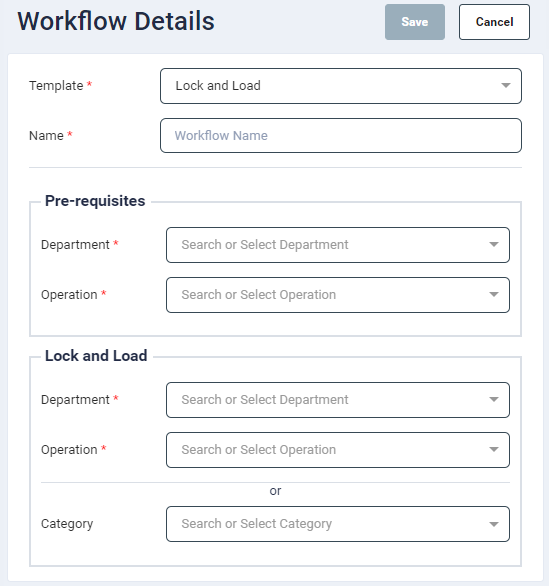
- Select the pre-requisites in the form of an operation performed in one or more departments. It is possible to select multiple operations across multiple departments.
- Select the operation to be locked and loaded from the department. Alternatively, one can select the work centre category as well. When selected, an operation of a job whose pre-requisites are complete will be locked and loaded if it is to be performed on the selected category.
- Click Save.
Operation shades
This workflow allows user to colour code specific type of operations on the Daily work / WIP / Production Board.
Use Case
Operator will be able to highlight an operation of the job or occurrence of an operation within group by changing the background color of the card on the daily work / WIP / Production board.
Setup
- Click the Workflow Engine menu item.
- Select the Operation Shades from the left side panel.
- Click the Add workflow button. Input the flow name as relevant to your use case.
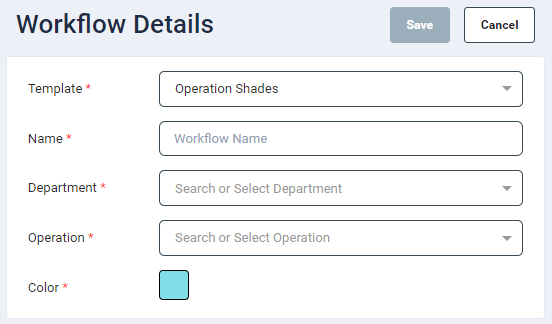
- Select the department where the operation will be performed.
- Select one or more operations, where the colour coding is to be applied.
- If multiple operations are specified, then all the operations have to be a part of the group to set the background colour.
- When the selected operation of the work centre is present in any component, it would highlight the component with the color specified in the workflow.
- Select the colour to be set upon the occurrence of the operation.
- Click Save.
If a single operation is configured in the flow, then the colour code will be applied to components which are assigned the single operation.
If multiple operations are configured in the flow, then the colour code will be applied to group component to which all the mentioned operations are assigned.
If multiple workflows are created for multiple operations of a work centre (one workflow for one operation), it would show the color of the first encountered operation.
If multiple operations are selected in a single workflow, then if any of them is present on the component, it would highlight that component with that color.
Status Dwell Time
The Status Dwell Time Workflow allow to set up alerts on the asset's status duration.
- From the workflow panel on the left, select status dwell time
Use Case
The user will be able to receive email alerts when any asset crosses the configured timeout duration.
Setup
- Click the Workflow Engine menu item.
- Select the Status Dwell Time from the left side panel.
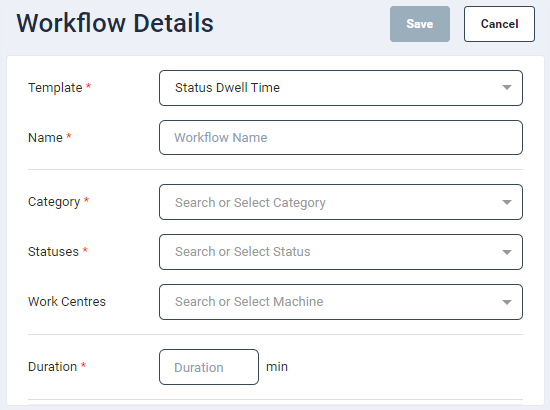
- Click the Add workflow button.
-
In the Status Dwell Time panel, provide input for the following fields:
-
Flow Name: Enter a flow name as relevant to your use case.
- Category: Single select a value from the dropdown list.
- Status: The statuses will be as per the selected category. Select as many values as required from the dropdown list.
- Workcentre: Select the required workcentres from the dropdown list.
- Duration: Enter a duration for the time out. (values in digits between 1 - 1440 minutes)
- Notification
- Email: To set email alerts, slide the Status toggle button to enable it.
- Recipients: Enter the recipient's email address. Multiple address separated by comma can be added.
- Subject: Enter a subject for the email (optional).
- Message: Enter a message for the email (optional).
Missed Goals Alert
The workflow allows to send alert of asset which are missed to achieve its goal.
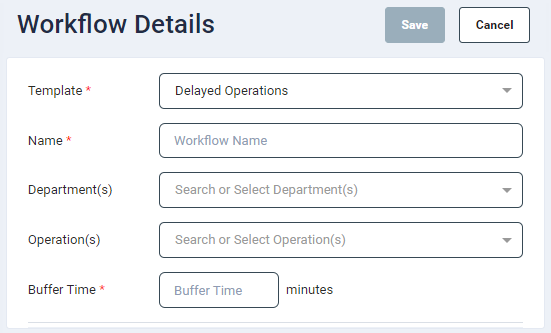
Delayed Operations
-
The workflow allows users to send alert when the operation exceeds the estimated time by some minutes (aka buffer time).
-
To configure it on all operations - do not select any department(s) or operation(s).
- To apply it on all operations of department - just select the department(s).
- To apply on specific operation, select the operation based on the department.
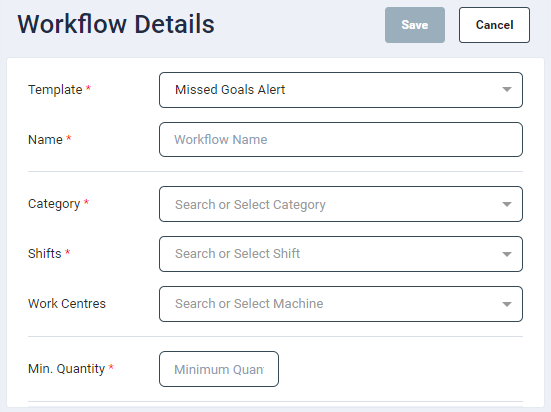
Missed Job Goals
- The workflow allows users to send alert when the operation misses the quantity required for the job.
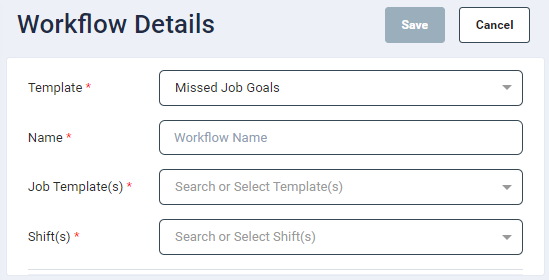
- Select the job template, and at end of day, all the jobs which are completed will be check if they achieved the required quantity.
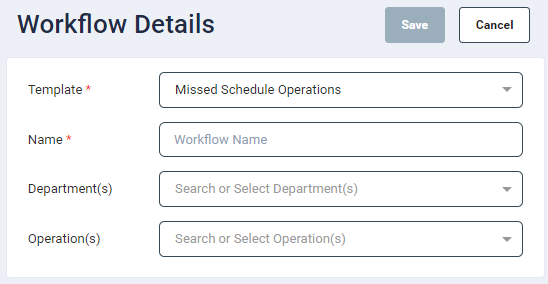
Missed Schedule Operations
-
The workflow allows users to send alert when the operation misses the schedule.
-
Select the department and its operation you want to monitor, at end of shift, all the schedules that are missed for that operation, will be notified.