Users
- The Users section allows a user to add other users and operators.
- To add new users, navigate to Configuration → User.
- This section allows creation and management of the Smart Shop Floor portal users and Tablet app users (Operators).
- By default, only active users and operators are displayed. To view all users, uncheck the Active Only box
- To search for a user, enter key words in the Search by Full Name text box and click the search icon.
- The data can be further refined by department drop down. Select as many departments from the Department dropdown filter and click Okay. To remove the selection, simply unselect the choices or click Clear All option in the search box.
- The Export button allows users to export data displayed on the page in Excel, JSON and CSV format.
User

-
The user list provides the following information of the portal users:
- User Name
- Full Name
- Department(s)
- Role
- Access: This column highlights the Web Portal and SFC App icons as per the access provided to the user from the configuration page.
- Created Date: this column will show date and time when the user is created.
- Status: This button allows you to enable or disable a user. Toggle the button to the right to set the status as active/enabled. This action can be performed in the configuration section as well.
- Customer Alert: This feature will be available to all portal users. It allows the user to receive email alerts for all the customer messages. Toggle the button to the right to enable.
- Action: This column allows you to view a user's Login Activity, Edit and Delete the user record.
Add a User
-
Click on the Add User button
 on the top right-hand side.
 -
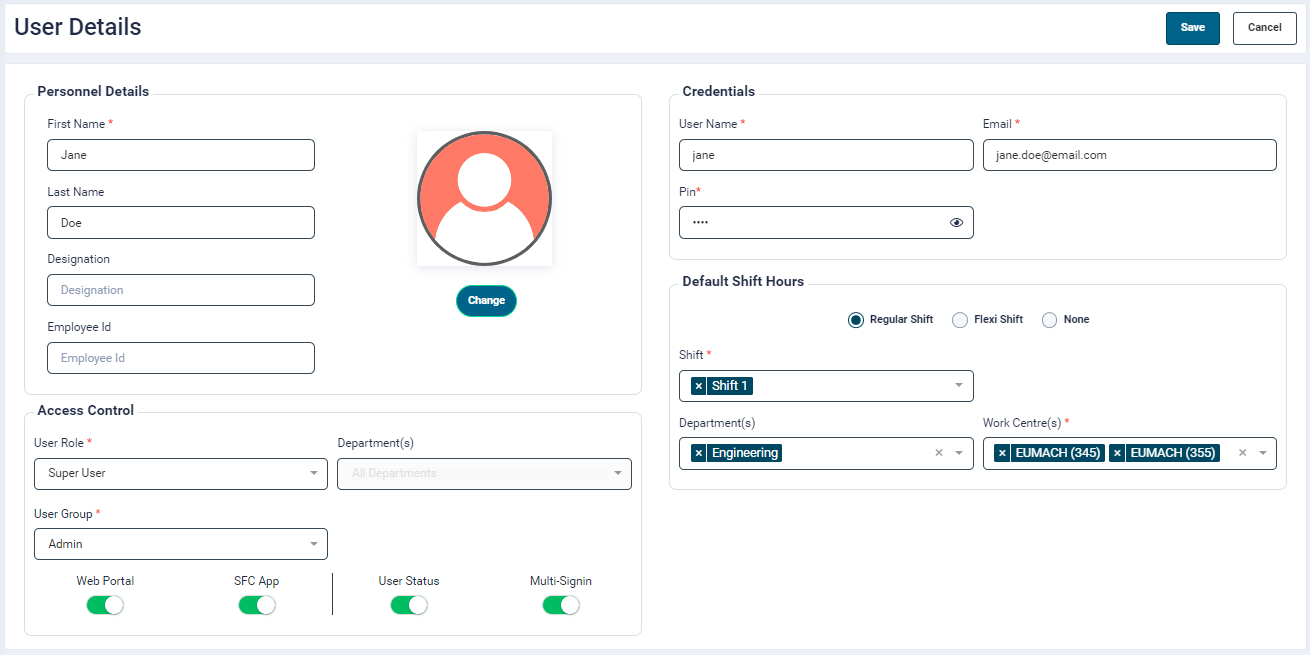
Upon selection the User Details screen will open
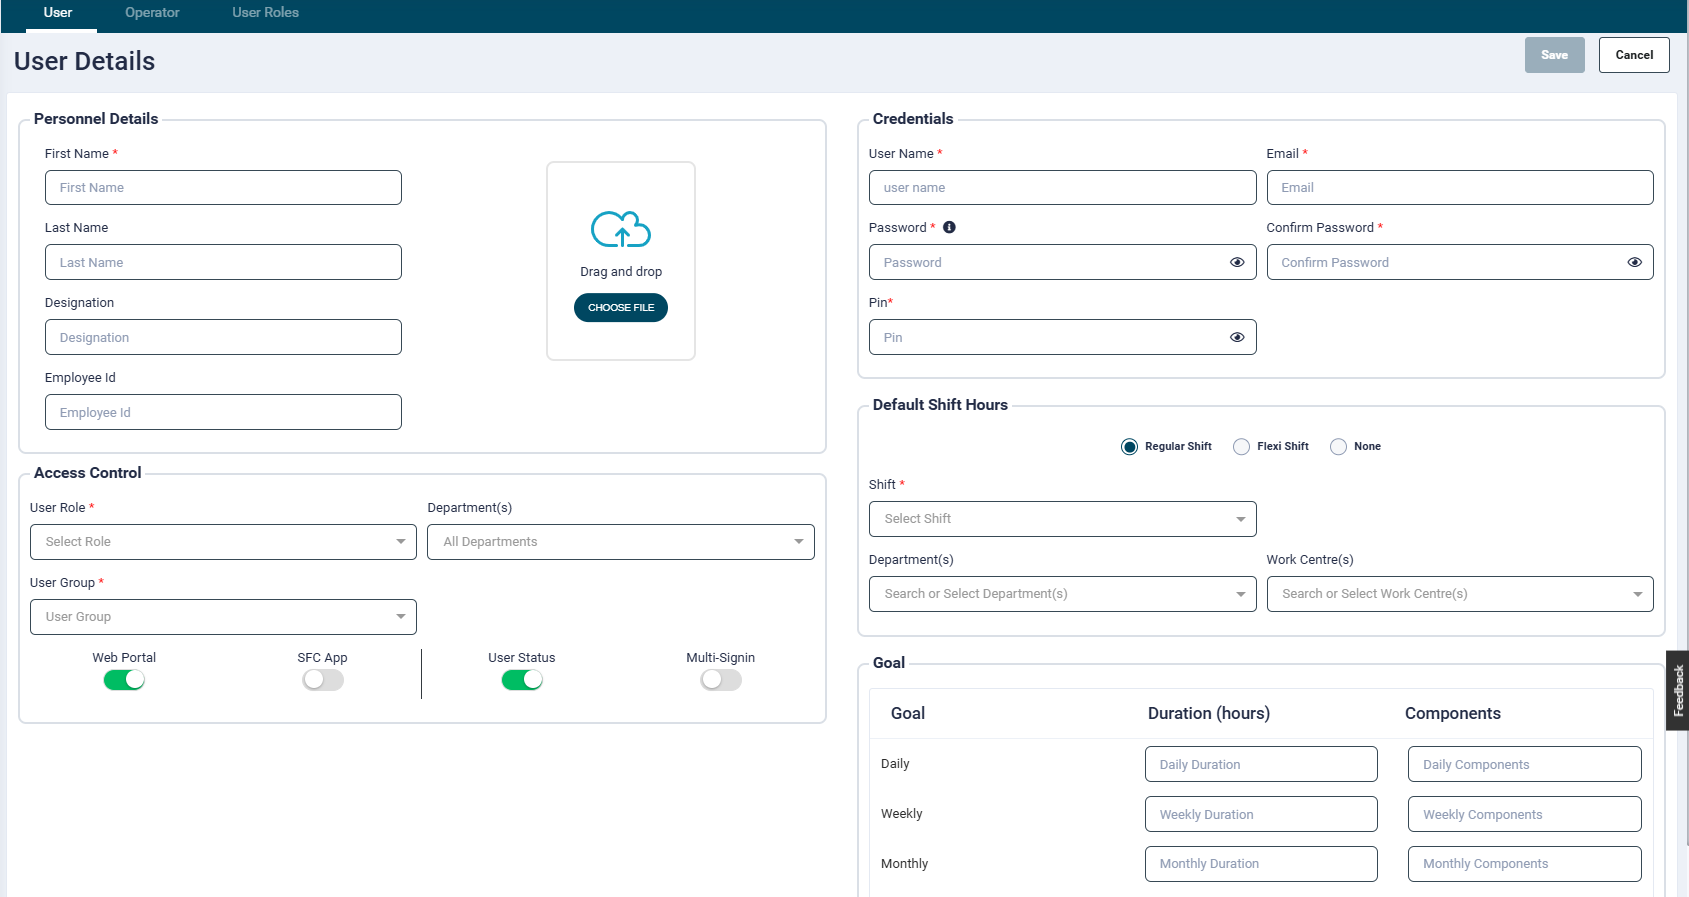
- Enter user details in appropriate textbox.
Fields marked with red asterisk are mandatory.
Personnel Details
- Follow the below mentioned steps for basic configuration
- First Name: Enter the user's first name
- Last Name: Enter the user's last name
- Designation: Enter the user's designation
- Employee Id: Enter an employee Id. Alphanumeric values are permissible.
- Avatar: Choose an Avatar i.e. an icon or image to represent the user
Access Control
- Follow the below mentioned steps for assigning access:
- User Role: Select a User Role for the user. The user role defines what kind of access to the SmartShopFloor web portal will be made available to the user. The following user roles namely are available by default.
- Admin: These users can access the SmartShopFloor web portal as well as the apps
- Super User: These users can access the SmartShopFloor web portal as well as the apps
- View only: These users can view the Smart Shop Floor web portal pages but cannot perform other actions. To configure more user roles please refer to the User Roles section.
- User Role: Select a User Role for the user. The user role defines what kind of access to the SmartShopFloor web portal will be made available to the user. The following user roles namely are available by default.
- Department: Assign a Department from the dropdown list. By default all Departments are assigned. For Super User role, this field is disabled.
- User Group: Select a user group from the dropdown list.
- This does not have any effect on what pages or access a user has. The User Role defines this access control.
- Web Portal: Enabling this switch would allow the user to login to the SmartShopFloor web portal. When enabled, a set of Credentials need to be configured as explained ahead. For Operator user role, the Web Portal switch is disabled and non editable by default.
- SFC App: Enabling this switch would allow the user to login to SFC app using the Clock-In Pin. For Operator user role, the SCF App switch is enabled and non editable by default.
- User Status: This button allows you to enable or disable a user. Toggle the button to set the status as active/inactive.
- Having an inactive user will cause the following:
- Any future jobs having this user assigned would be removed.
- This users data would not be considered in future for capacity utilisation widget.(next month)
- This user wont be shown in manual attendances and timesheet report in future.(next day)
- Multi-Signin: Allowing multi sign in will enable the user to login with multiple sessions.
- Without multi-signin the user will only be able to login to the Shop Floor Control app with one session at a time. Logging into another WorkCentre whilst already logged into another will log the first session out.
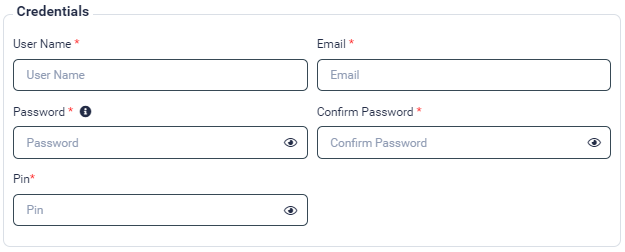
Credentials
- Credentials are based on Web Portal and SFC App access granted to the user.
Web Portal Access
-
If the Web Portal switch is enabled, the following Credentials need to be provided:
-
User Name: Enter a unique username. Permissible input: minimum 3 to maximum 50 characters, including UPPER and lower case, numbers and special characters like _-@.
- Email: enter a valid email that will be used for password reset and OTP confirmation
- Password: Set a password for the user. This must contain a special character, capital letter, numerical and an alphabetical character.
- Confirm Password: Enter the same password to confirm.
- Pin: Enter a 4-digit pin which would facilitate user to log in to the SFC App as well as Clock-In and Clock-Out on the Shop Floor Attendance (Clock-In Clock-Out) app.
- This must be unique per user/operator as it is an identifier for logging into the Shop Floor Control or attendance app
- If the Web Portal switch is not enabled (i.e. for Operator user), then only the Pin number needs to be entered.
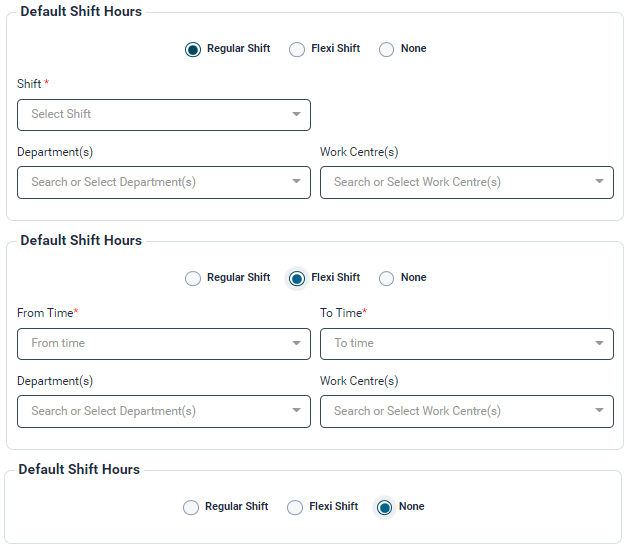
- This feature allows you to set a default shift for the user.
- There are three options available: Regular Shift, Flexi Shift and None.
- Select the required radio button and provide the relevant input.
- Regular Shift:
- Shift: Select the shift (as defined in Business Hours) the employee will be working on from the Shift dropdown field.
- Department(s): Select/search the Department the employee will be scheduled against
- Work Centre(s): Select/search the Work Centre the employee will be scheduled against
- Flexi Shift:
- Shift Time: Select the shift From Time and To Time. On any given day, the selected user will be available only as per the timings defined here. The Department and Work Centre field are as described above.
- None: This is selected if the user does not have operating hours for the business and is not required for timesheet or capacity calculations.
- Regular Shift:
Once all the required information is added, click Save to save the record.
User Profile
Once the users log into their account, they can access their profile by clicking their name displayed on the top right-hand corner of the page.
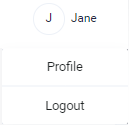
- On clicking Profile, a My Profile page will open.
- The user can update their First Name, Last Name, Phone Number, Designation and Avatar.
- This window also displays a Mobile App configuration option to activate the Utilisation Monitoring tablet app and Smart Shop Floor mobile (for both Android and iOs) before login.
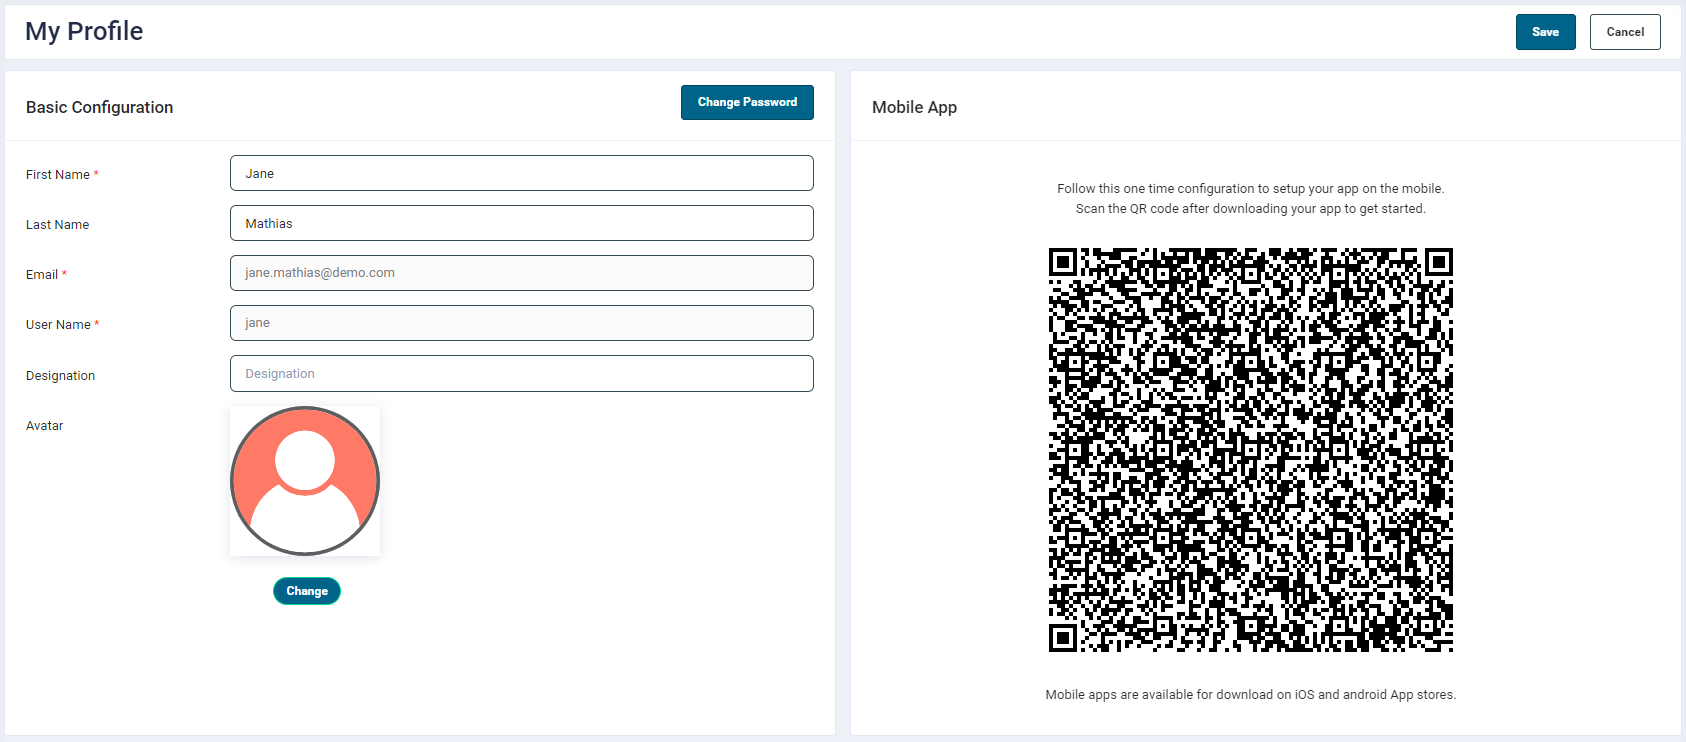
- The user can update their information and click Save.
- To update the password, click the Change Password button.
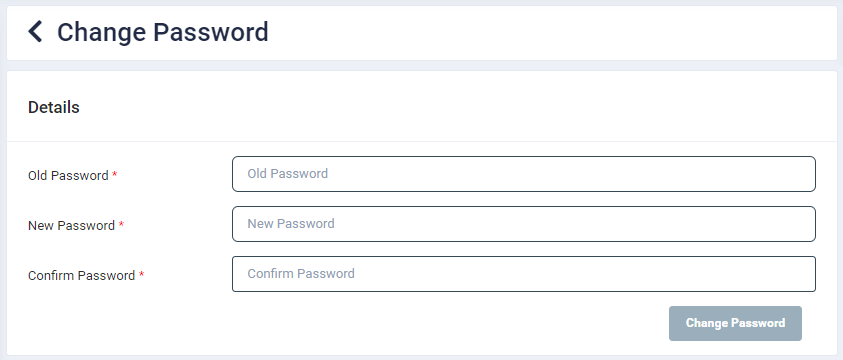 * On the next screen, the user can set a new password (The password must contain at least 8 characters, including UPPER and lower case, numbers and special characters like @$!%#*_=?&) and click Save.
View User Login Activity
-
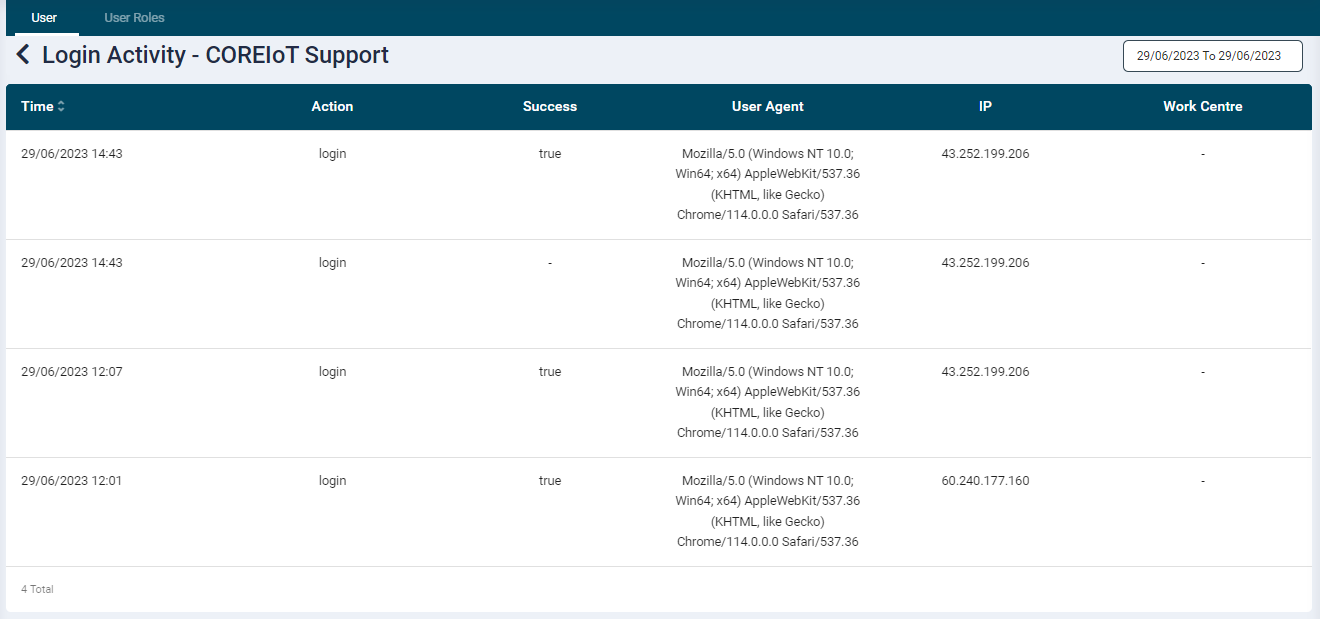
On the listing screen the Login Activity button under the Action column provides access to the user's login activity to the Web Portal.
-
Upon click, a screen with the following login details will be displayed.
- Time: Displays the date and time stamp
- Action: displays whether action was Login or Logout
- Success: displays whether the Login or Logout action was successful
- User Agent: Displays the information of system used to access the app
- IP: displays the device's IP address
- Work Centre: Displays the name of the work centre viewed/worked on from the app
View Users digital form submissions
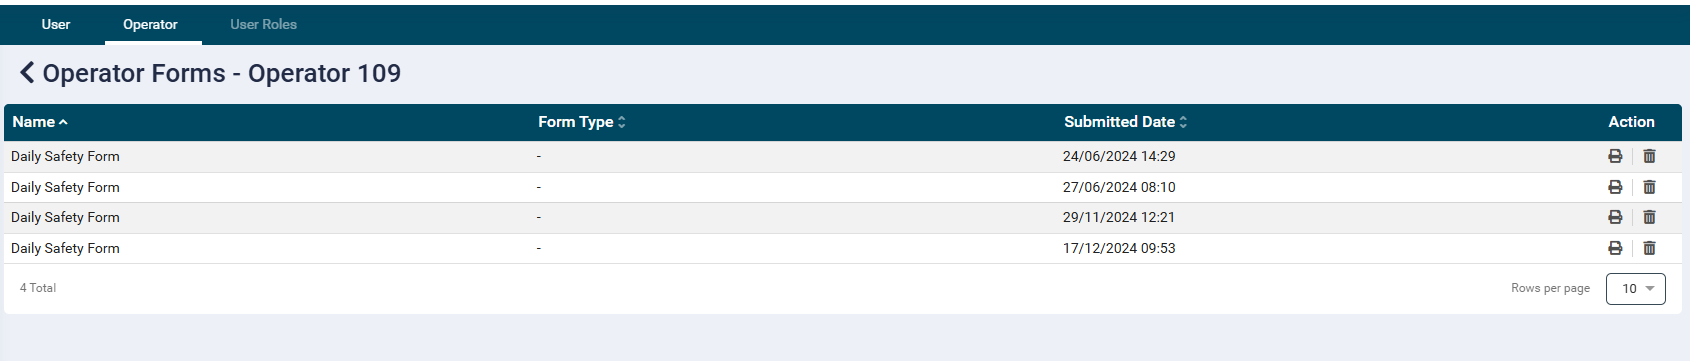
- Clicking on the calendar icon will open the digital form submissions tab.
- Here you will be able to see any safety or user/operator level forms that have been successfully submitted by the User.
- You can view the form by clicking the printer icon
- You can delete the record by clicking the trash can icon
Modify User Record
Edit a user
- To edit a record click the Edit icon
 under the Action column of the required user.
- On click, the details page will open for editing.
- Update the fields as per requirement.
- Click on save button to update the user profile.
Users are not permitted to delete their own profile. Only an authorised personnel having appropriate access rights can delete other users.
Delete a user
- To delete a user click on the Delete icon under the Action column of the required record.
- Click Confirm in the pop-up to proceed with the delete action.