Setup
- This section enables you to grant your customers access to real-time updates on the progress of their jobs.
- Customers will need to be added before they appear via the blue Add Customer button on the top right-hand side
Add Customers
- The first step is to add customer names in their respective job configurations (via manual or bulk import).
-
The customer name automatically gets linked to the Setup section.
-
Go to Customer Updates → Setup section.
- To setup the customer account, click on the Add Customer button at the top right-hand side of the screen.
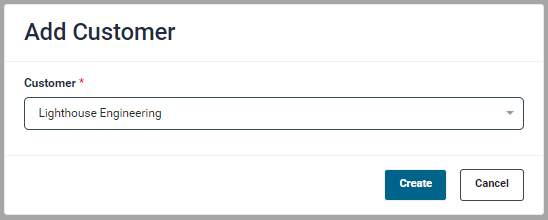
- In the pop-up window, search and select the customer name from the dropdown list and click Create.
-
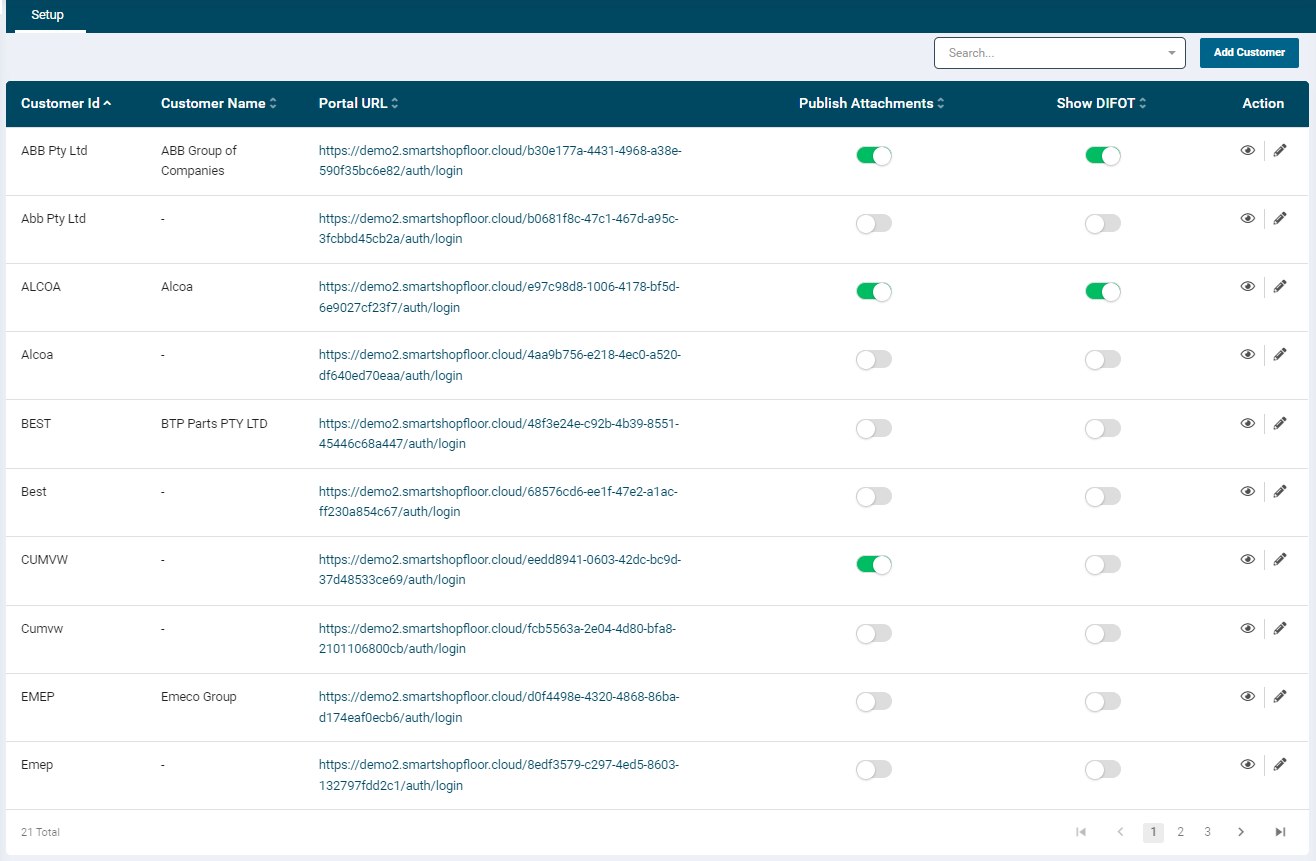
The customer account will get added to the listing screen along with their portal URL.
-
The listing page displays the following information:
- Customer Id
- Customer Name
- Portal URL (Job Progress Summary portal of the customer)
- Publish Attachments: This button allows you to provide the customers an access to the attachments added to their jobs
- Show DIFOT: This button allows you to display the delivery matrix on the customer portal. For more information please refer the Delivery Performance Metrics section
- The Action column provides the option to View and Edit the customer records.
- View: Allows you to view customer job details.
- Edit: Clicking the Edit button will display a page where the user can provide Customer Details, Authorised Contact and DIFOT Settings.
View Customer Jobs
-
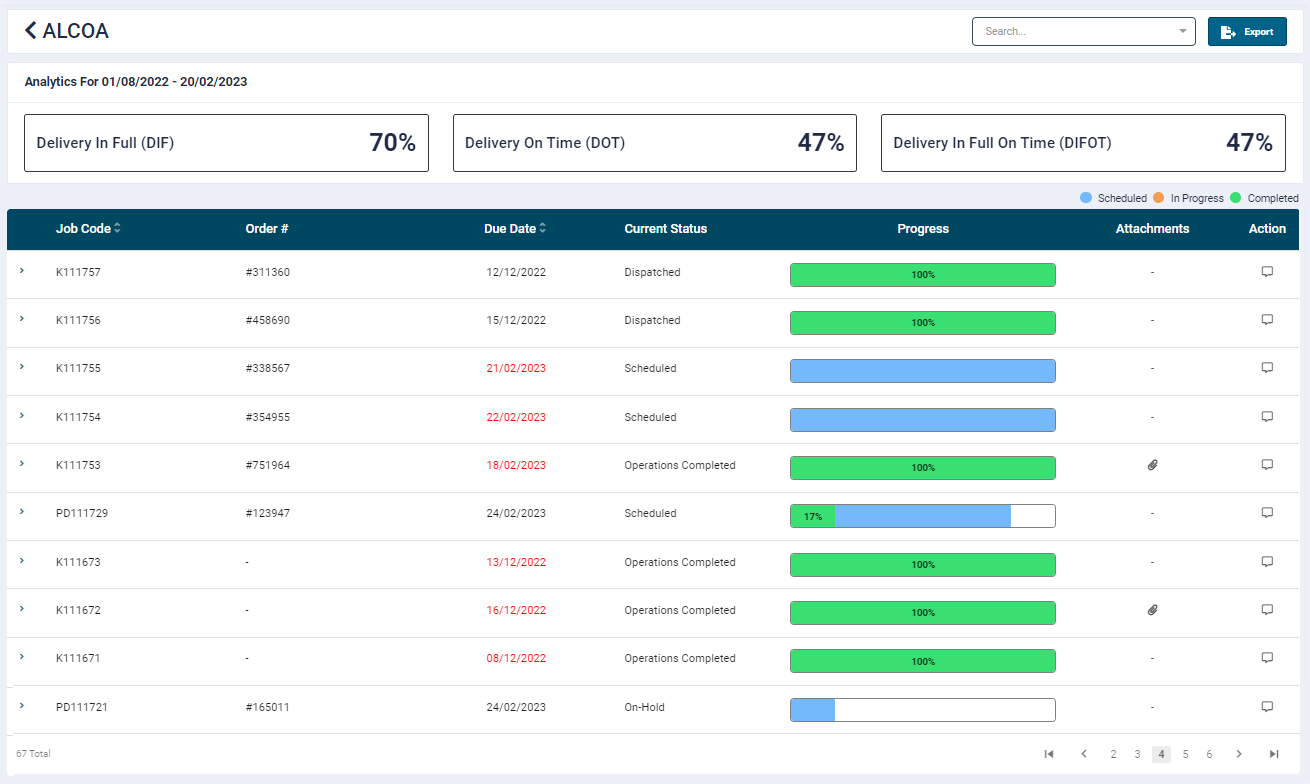
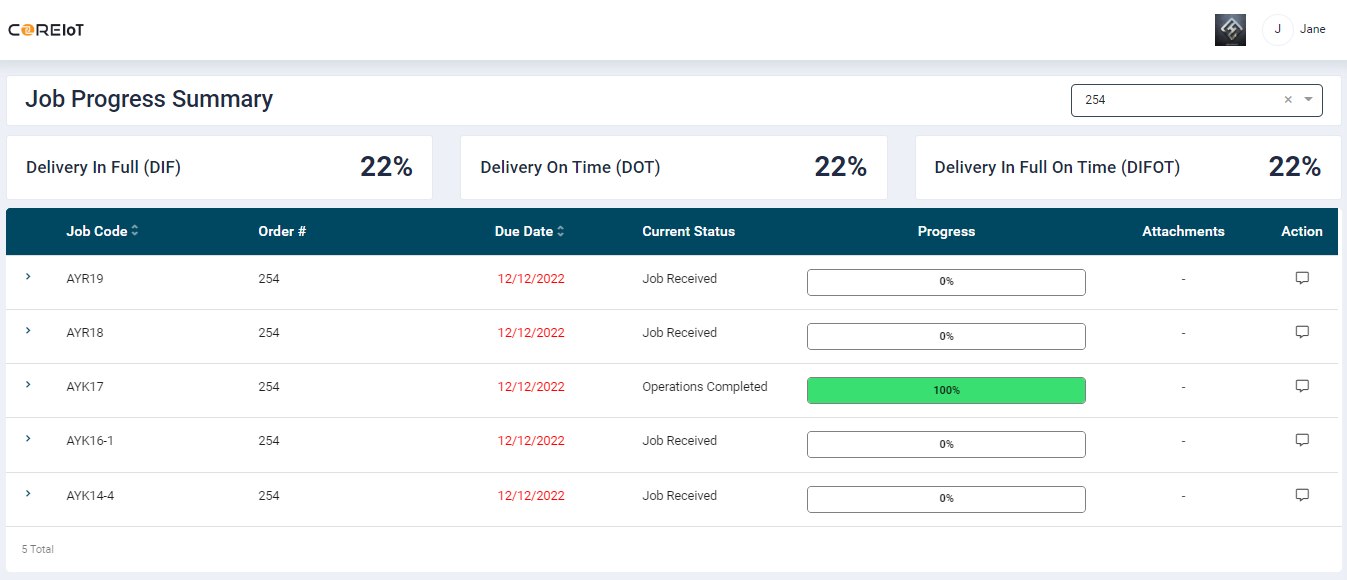
Clicking the View button will navigate you to a screen that displays month-to-date and last month(s) job data for the customer along with other information as explained ahead
-
You can filter the data by using the Search by Job Code option.
- This data can be exported to Excel, JSON and CSV formats by clicking the Export button.
Job progress Details
-
This screen also provides the following information:
- Job Code
- Order #
- Due Date
- Current Status
- Progress: This column displays job progress bar (Scheduled, In Progress and Completed)
-
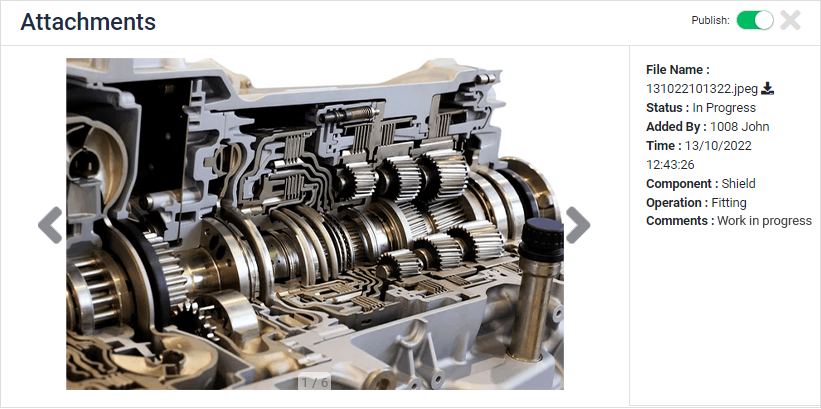
Attachments:
- Any image attached to the job via the Shop Floor Control Tablet App will be available in this column.
- Any image attached to the job via the Shop Floor Control Tablet App will be available in this column.
-
Clicking on the Attachment icon will open the image window.
- To make the image available to the contact, use the publish toggle button.This will allow the customer to also see the attachment.
- Action: This feature allows exchanging of messages and information between the client and the end customer.
Customer Details
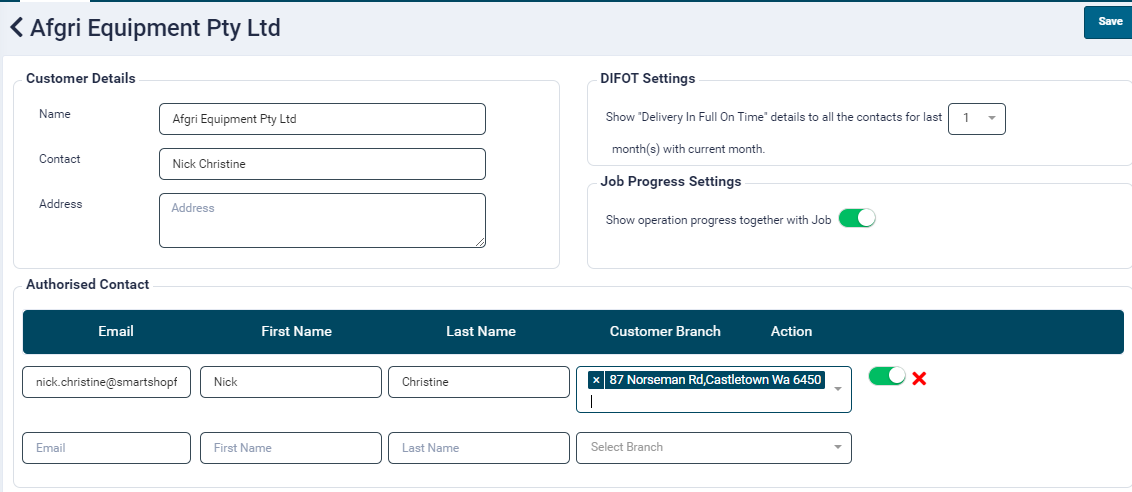
- From the Setup listing screen, click the Edit button,
- On the edit screen, add the following customer details:
- Name
- Contact
- Address
- Add the following information of authorised contacts who would be provided an access to the Customer portal.
- First Name
- Last Name
- Customer Branch
- Under the DIFOT Settings, select the required valued for past months DIFOT data. 1 month is selected by default.
- Click the Save button at the top right-hand side to save the records.
Invite Contact
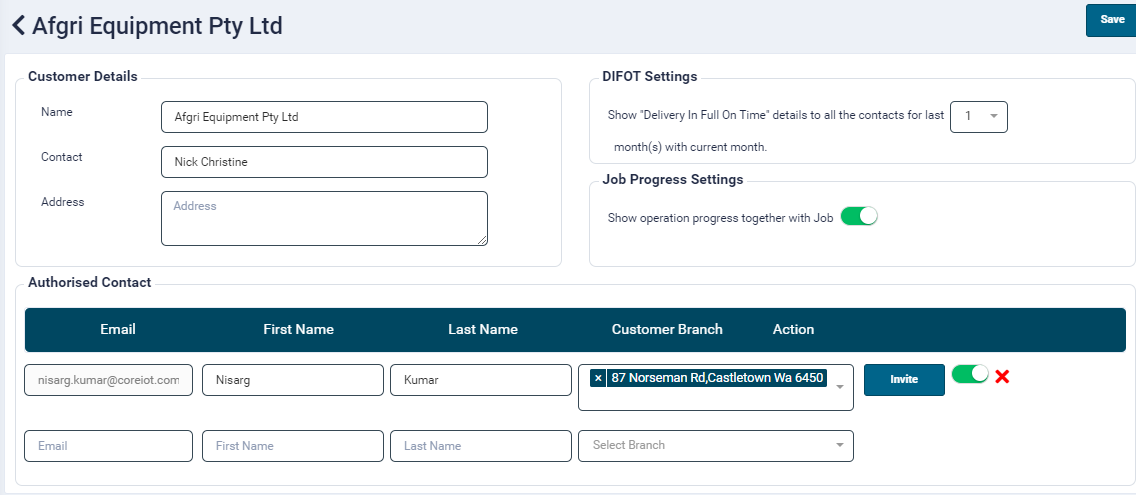
-
Once the information is saved, an Invite button will be displayed against each record. This invitation will allow the contact to access the Job Progress Summary portal.
-
On clicking the Invite button, an email will be sent on the contact's email address.
-
In the event the contact looses their account URL, the user can send them the invite again.
-
The contact can be disabled and deleted by using the toggle and delete icons respectively.
Contact Account Activation
- After saving and clicking the Invite button, Customers will get an email to create an account to access the customer portal. The email will contain their account URL and a link to set the password and access their account.
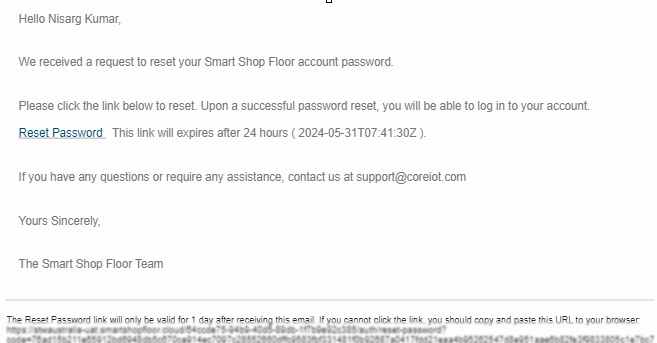
- Clicking on the link will navigate the contact to a Reset Password screen.
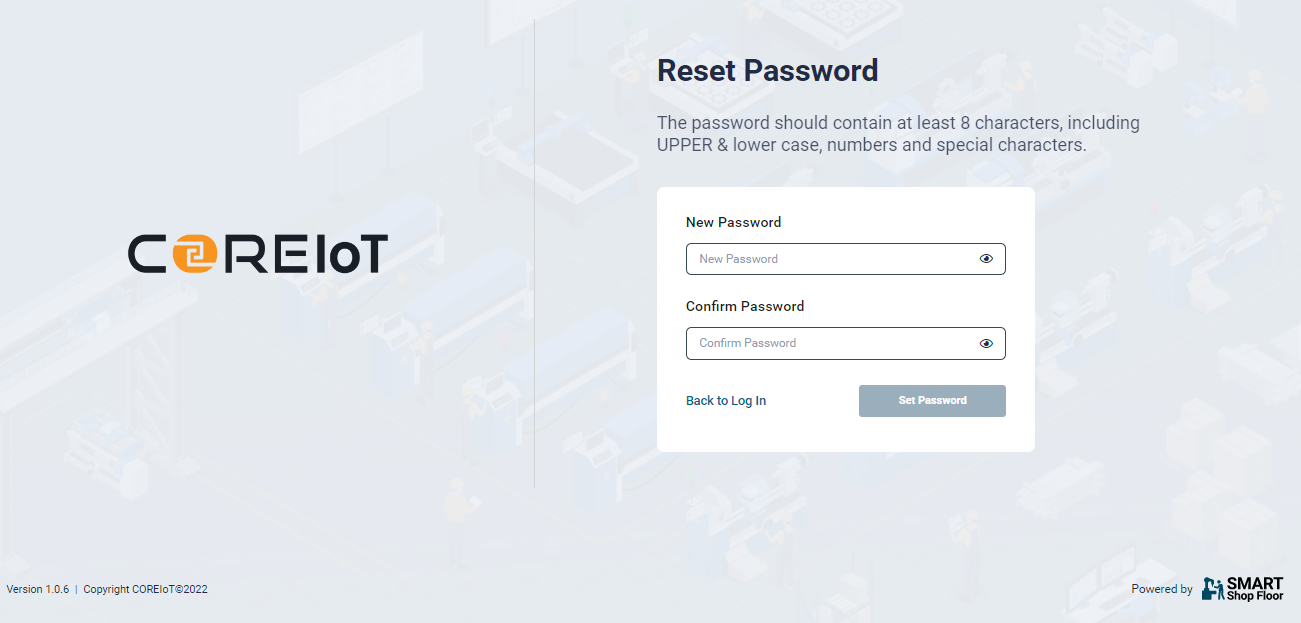
- Once the password is set, the portal login screen will be displayed.
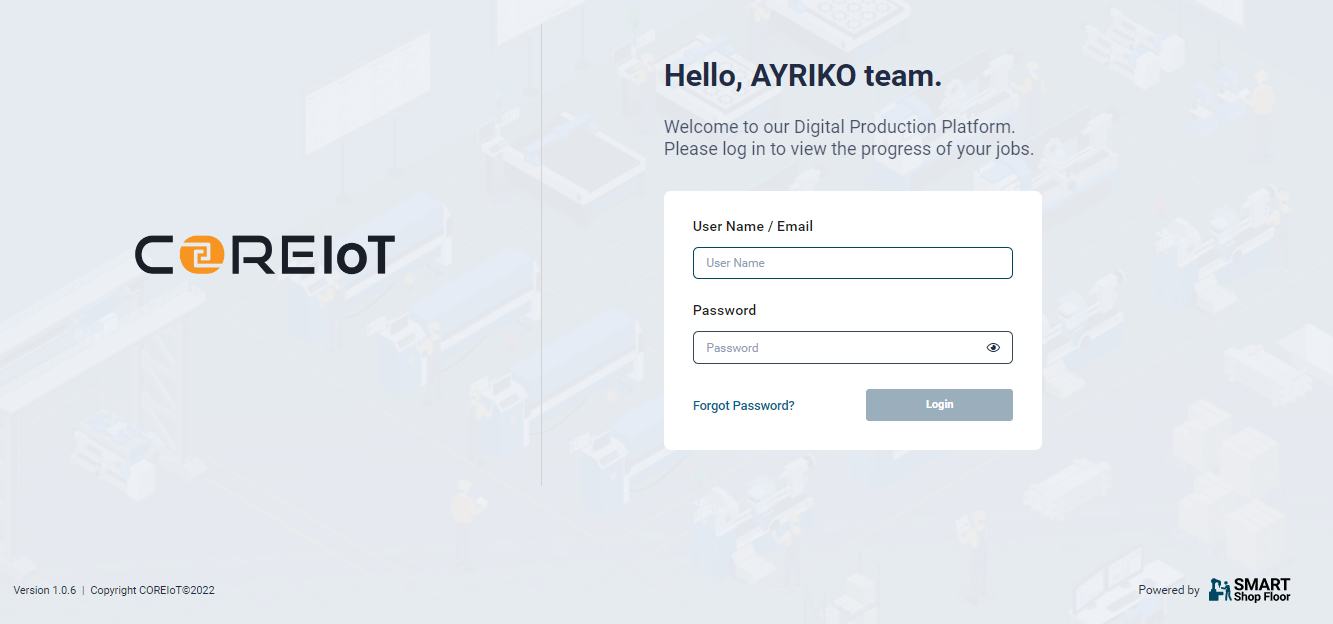
- The contact needs to enter their email address and the password they set in the previous step and click the login button.
Job Progress Summary Portal

- Once the contact logs in, they will be able to view jobs relevant to them along with the following information:
- Job Code
- Note
- Branch
- Order Number
- Due Date
- Current Status
- Action: As mentioned above, the attachments will be available to the contact only if it is published by the user from the SmartShopFloor portal
- The due dates of jobs which are delayed are highlighted in Red.
- The contact can filter data by job code and order number.
- The data can be exported in Excel, JSON and CSV formats by using the Export button.
Sending Messages
- The SmartShopFloor portal user (client) can access this feature from the Job Tracking and Setup sections.
- The Job Progress Summary portal user (customer) can access this feature from the Job Progress listing page.
- E-mail alerts for chat notifications can be enabled from the User section.
Messaging from Job tracking
![]()
-
Clicking on it will navigate the user to the message screen at the job level.
-
On the Job Tracking listing page, clicking on the downward arrow provided at the beginning of the record will display the components under it.
-
Clicking on it will navigate the user to the message screen at the component level.
-
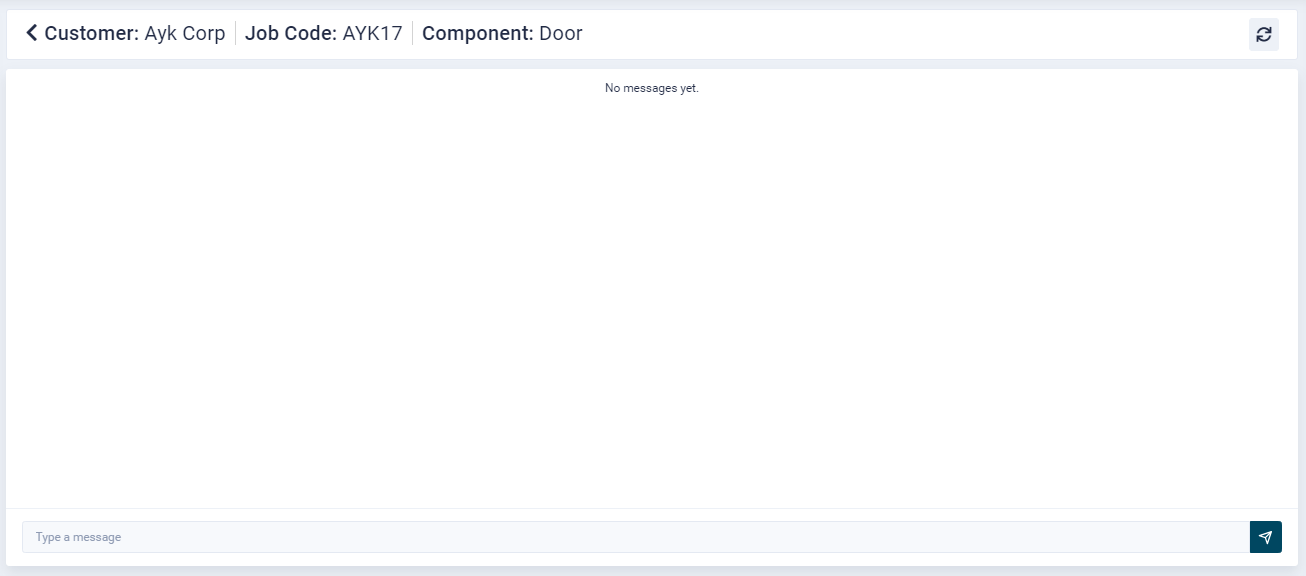
Once on the message screen, the user can type a message for the customer.
- Both the customer and client can share information and attachments.
- There are no restrictions on the file type, however max zip file size supported is 15MB.
- Please note that at a time too many files can be added to the chat.
- On the message screen, all image files will be displayed, whereas for other file formats their respective icons will be shown.
- When a client/customer opens a file from the message window, images and video files will open in new tab, and all other files e.g. excel, zip etc will download in the browser.
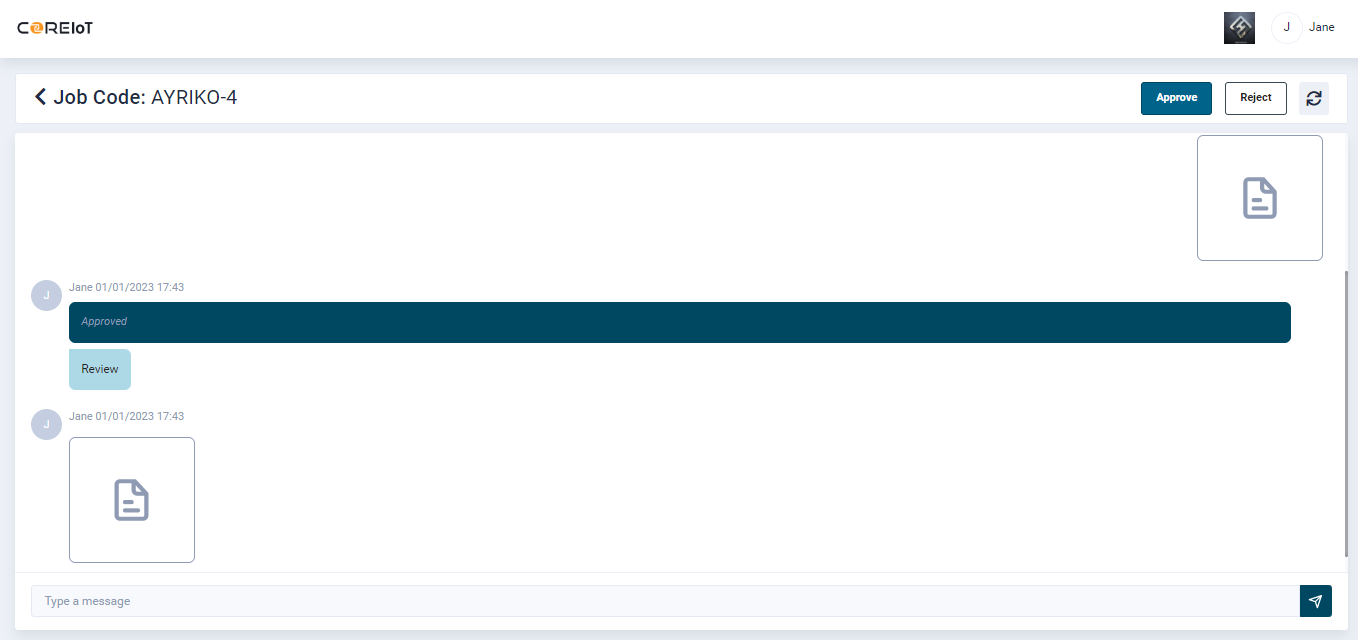
Approve, Reject and Refresh
Approve
- This module allows the users to approve and reject the communication exchanged between the client and the customer by way of documents.
- To approve, click the Approve button provided at the top right-hand side of the message screen.
- On click, a pop-up window will open.
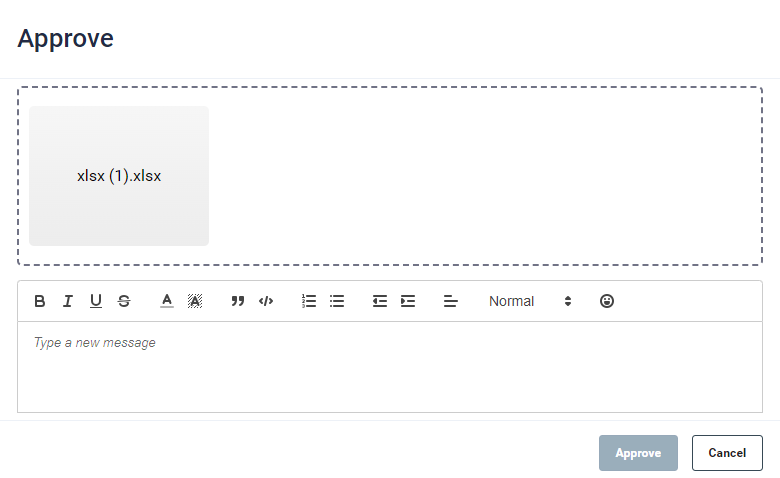
- Attach a relevant file, provide a reason for approval and click the Approve button.
Reject
- To reject, click the Reject button provided at the top right-hand side of the message screen.
- On click, a pop-up window will open.
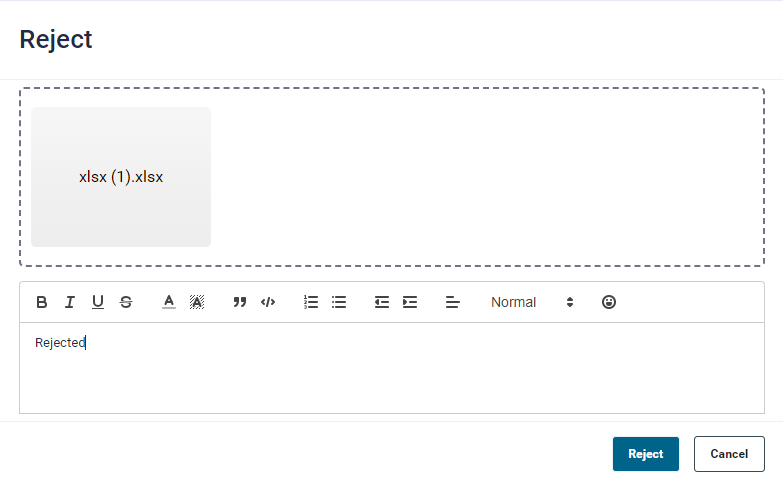
- Attach a relevant file, provide a reason for rejection and click the Approve button.
Refresh
- To load latest messages, click on the Refresh icon
 at the top right-hand side of the message screen.
To remove any file from the Text box or the Approve and Reject pop-up window, simply click the remove icon (displayed on hover over)
Messaging from Customer Setup
- Go to Customer Updates → Setup.
- Go to the required Customer record and click the View button to access the job listing page.
- For sending messages, follow the steps mentioned under Messaging from Job Tracking section.
Messaging from Job Progress Summary Customer Portal
-
The messaging feature in Job Progress Summary is the same as in the Messaging from Job Tracking section.
-
The customer can send job level or component level messages.