Job Tracking
This section gives users a visual progress report of all jobs. It is based on the total components of a job with varying percentage of job completion
![]()
- The listing page displays job and component level progress with the option to customise what columns you want to view in the Job Tracking page by clicking on the cog on the top right hand side.
![]()
- This settings window will allow you to pick up to nine display columns for the job tracking page and allows you to customise what order you want to display the columns. Any Custom Job Field items can be displayed here if they are enabled for Display on UI (More information available under Job Configuration -> Custom Job Fields)
-
The default column configuration is as per the below:
- Job Code
- Order #
- Customer
- ETC
- Due Date
- On Track:
- Current Status
- Progress: The statuses on the progress bar are categorised as below:
- Scheduled, Order Received (White)
- Remaining %
- In Progress (Orange)
- In progress %
- Completed (Green)
- Completed %
- Scheduled, Order Received (White)
-
The Action column provides the following features:
- Message: To learn more, please visit the Setup section.
-
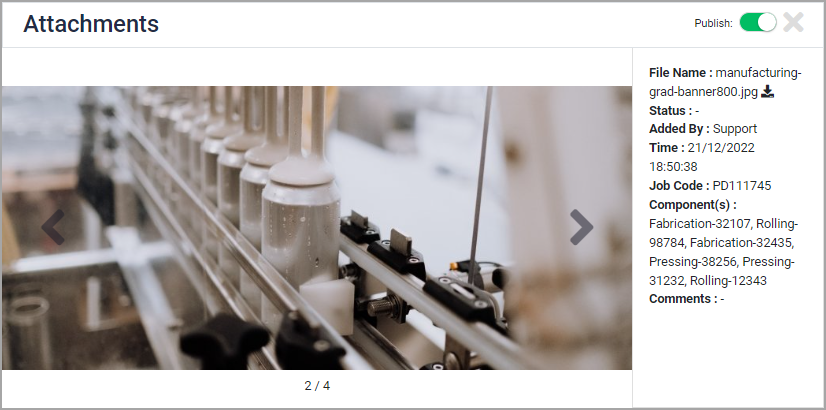
View Attachments:
-
This icon is visible only when an image is attached to any job. Clicking on it will open a pop-up window.
-
All the attachments can be viewed by clicking the forward or backward arrows at the bottom of this window. For each attachment their details are displayed at the right-hand side of the pop-up window.
- Click the cross icon to close the window.
- Print: To learn more, please refer the Print Function section.
- View: The user can view the job details by clicking the View icon.
- Clicking on the arrow in front of the job records will expand the row and display all the associated componenets, their status & progress.
![][(jt_viewcomponentlist.png)
-
Filters
- The user can search data by Job Code and Customer Name by adding relevant text in the Search text box.
- Users can choose the date range via the filter on the top right hand side next to the settings icon
- The status filter can be accessed from the top right-hand side of the screen which will allow you to remove statuses from the list of jobs.

- The data can be exported in Excel, JSON and CSV formats by clicking the Export button on the right-hand side of the screen
Job Tracking Details
- Clicking the View icon under the Action column will open job detail page and display a list of components and their statuses.
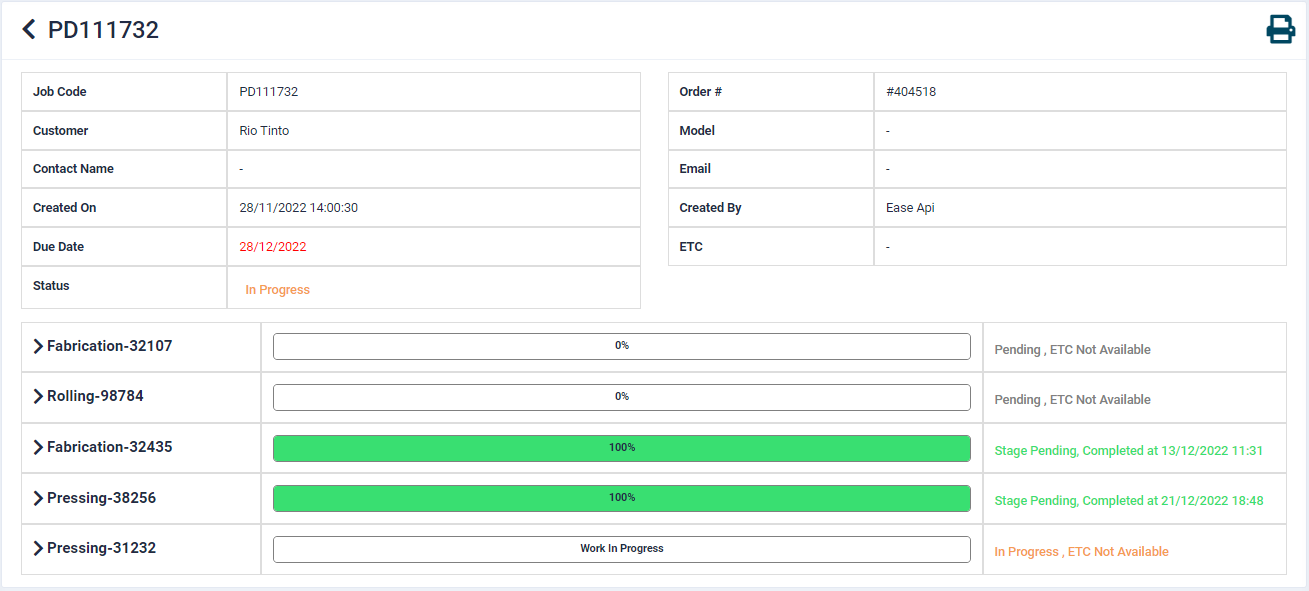
- Clicking on the arrow in front of the component names will expand the row and display the assigned work centre(s) in case of multiple operations, the job progress bar, job status and date stamp.
- When all the operations of a component are completed, it will move to Staging Queue.
- The status will be updated as per the below stages of job completion:
- Component Level Status
- Dispatched at dd/MM/YYYY HH:MM
- Stage Completed at dd/MM/YYYY HH:MM
- Stage Pending, completed at dd/MM/YYYY HH:MM
- In Progress, ETC at dd/MM/YYYY HH:MM (highest completion time)
- Pending, ETC dd/MM/YYYY HH:MM (smallest Schedule time)
- Pending, ETC Not Available
- WorkCentre Level Status
- Completed on dd/mm/yyyy HH:MM
- In progress, ETC at dd/MM/YYYY HH:MM (estimated completion time) if the time is past then append (Delay) in the end.
- Pending, ETC dd/MM/YYYY HH:MM
- Pending, ETC Not Available
- Component Level Status
For more information, please refer our Staging Queue training guide
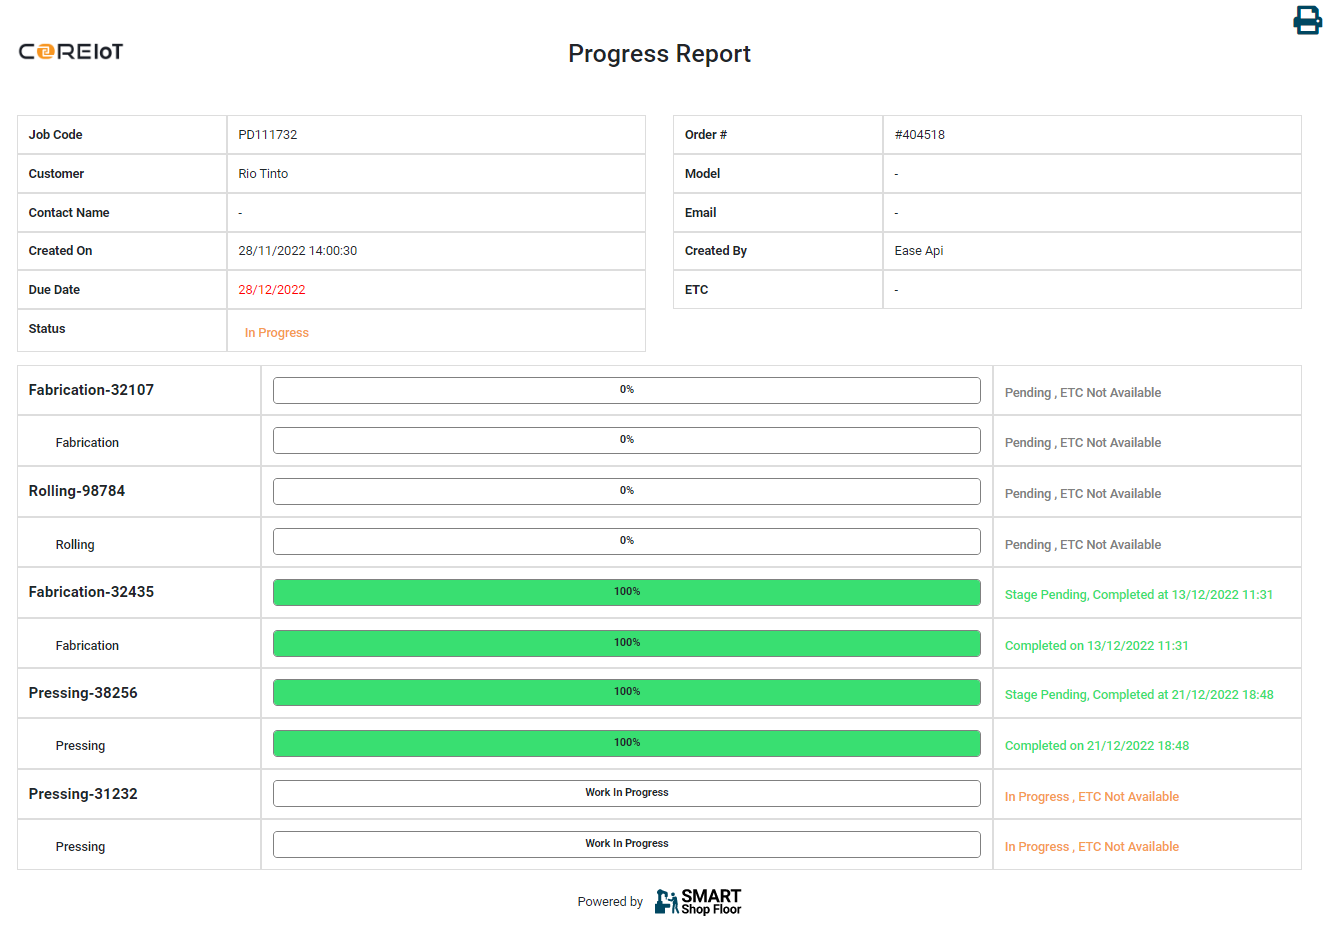
Print Function
- The user can print the data by clicking the Print
 button under the Action column.
 - When the data is printed from the listing page, it will print the information upto the component level.
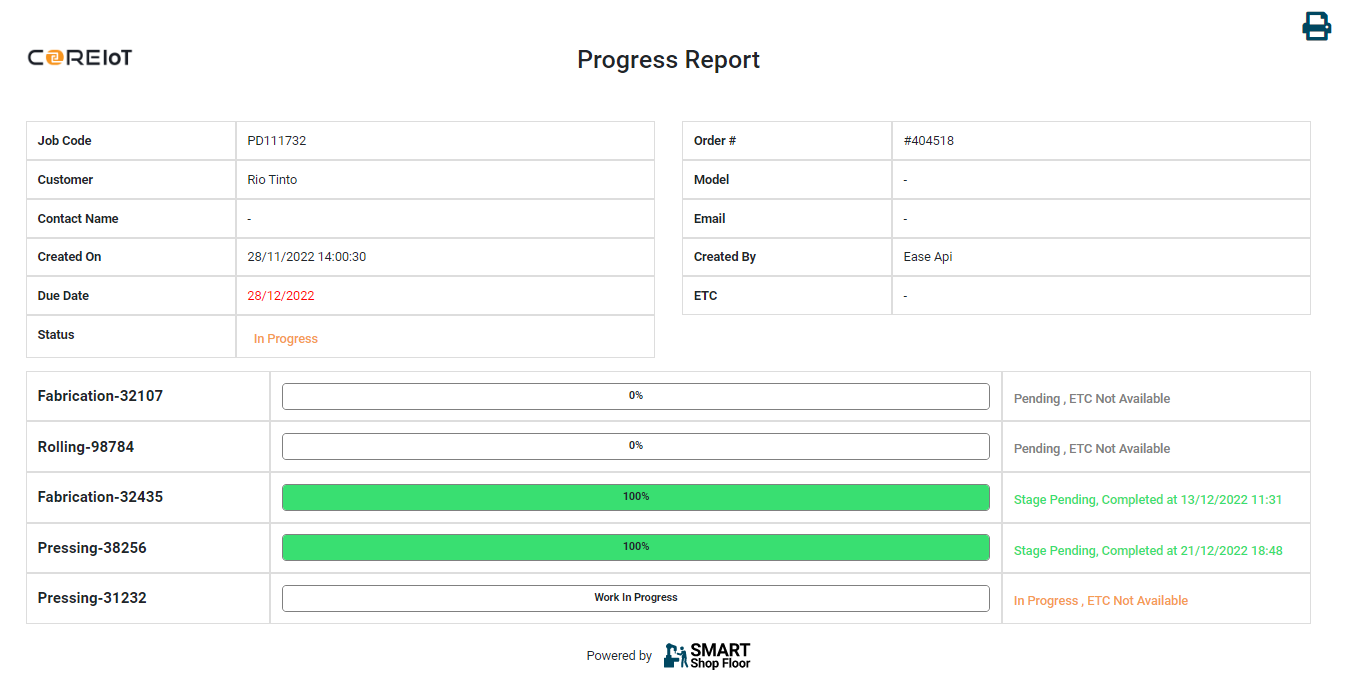
- Clicking on the view button will open the job details.
- When the data is printed from the detail page, it will print the entire information upto the work centre level.