Category
Defining a category allows you to group machines or work areas in a department.
- Navigate to Configuration → Category from the left menu.

- This page displays a list of all the configured categories.
- User can also Edit and Delete a category.
Configuring a Category
- Before adding a category, ensure that the Status has been created in order to allocate them in the category creation.
- For adding a new category, click on the ‘Add Category’ button displayed on the top right-hand side of the page.
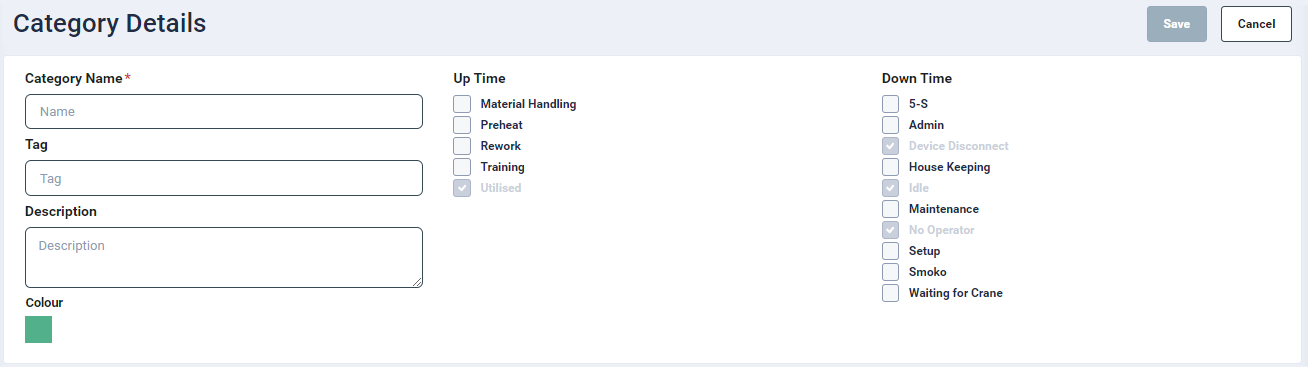
- In the Category details page:
- Enter a unique name in the ‘Category Name’ input field. This is mandatory.
- Tag: Enter a unique tag name for the category.
- Enter a description in the ‘Description’ textbox, if required.
- Select the required Uptime and Downtime statuses. The default statuses are automatically assigned to all the categories which are not editable.
- Default statuses will not appear as buttons on the tablet app
- Uptime and Downtime statuses will appear on the tablet app after logging out and logging back in once they have been enabled and saved
- Colour: To assign a colour, click the colour picker and select a required colour or enter a colour hex code.
Category Edit & Delete
- A category can be deleted only if it is not bound to any Machine.
- Click on the Edit icon
 to edit the category.
 - On the edit screen, update the category name, tag, description and statuses.
Filter
- To filter the data on the listing screen, search or enter a required value in the Department dropdown box.
- The user can search configured operations by entering key letters in the Search text box on the top right-hand side of the screen.